Using the GIMP to Simulate VGA Graphics


Learn how to apply a VGA style color palette and pixel shape to any given image using free software.
To begin, we'll need a copy of the GNU Image Manipulation Program, and a source image. The GIMP is available for download from gimp.org at no cost. It runs on Linux, Windows, and macOS.
 Mica Semrick
Set up the Palette
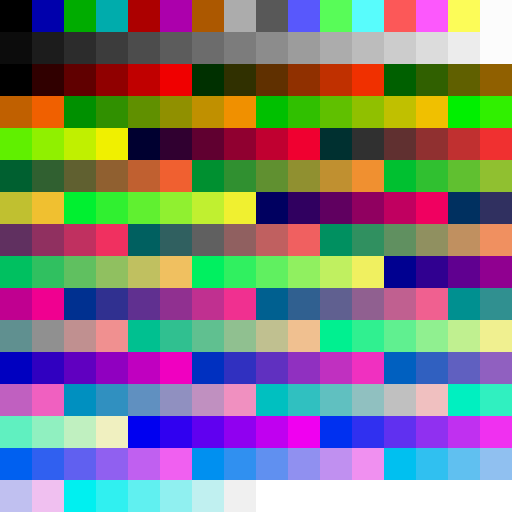
The original VGA card and its clones had a limited color palette with a maximum of 256 colors displayed on screen at any given time, specified at an 18 bit color depth (RGB values of 0-63 per channel). Developers could select any combination of colors to make up this palette, depending on what's needed in a particular scene.
For our purposes, we'll use a fairly generic palette that should work for a variety of different images. It's based on the Web Safe palette, which gives us 216 unique shades of color, with an additional 16 shades of gray, along with the original 16 color CGA palette.
To use this palette, right click the image, and select 'Save Image As...', then open it in the GIMP.
From here, select the 'Windows' menu, go into the 'Dockable Dialogs' item, and select 'Palettes'. This should open the Palettes dialog on the upper right side of the window. It will display a list of color palettes that ship with the GIMP, along with any custom palettes that have been saved.
From here, right click on one of the palettes, and select the 'Import Palette...' menu option. This will open a new dialog box:
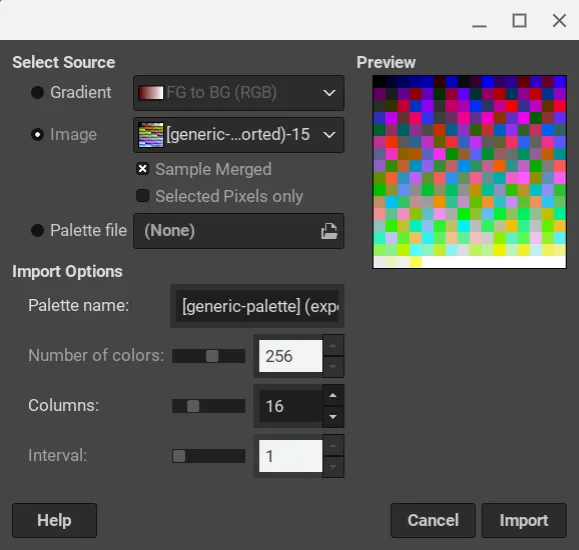
Under 'Select Source' choose Image. The dropdown next to it will show any images that are currently open in the GIMP. Select the image of the generic VGA color palette. Under 'Import Options' you can provide a name under the 'Palette name' option. Press the 'Import' button to create the palette.
Converting Our Image
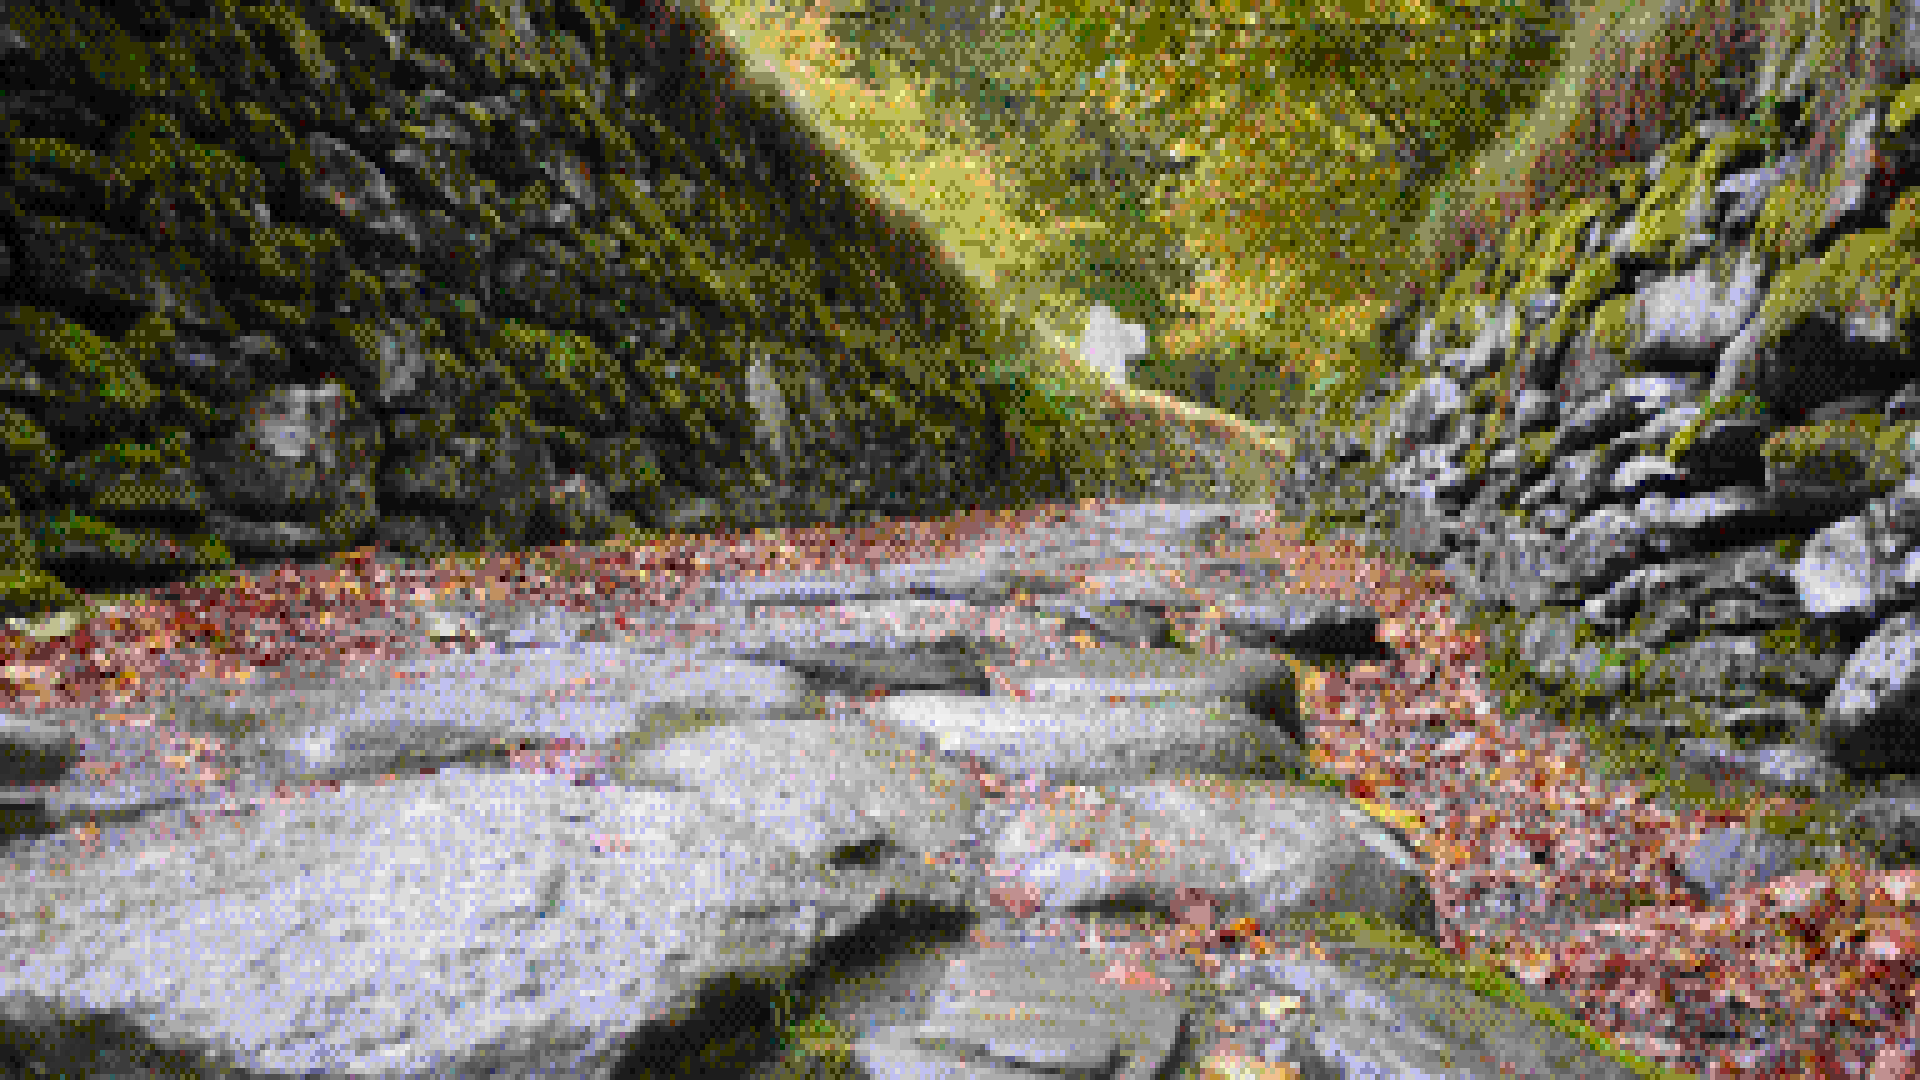
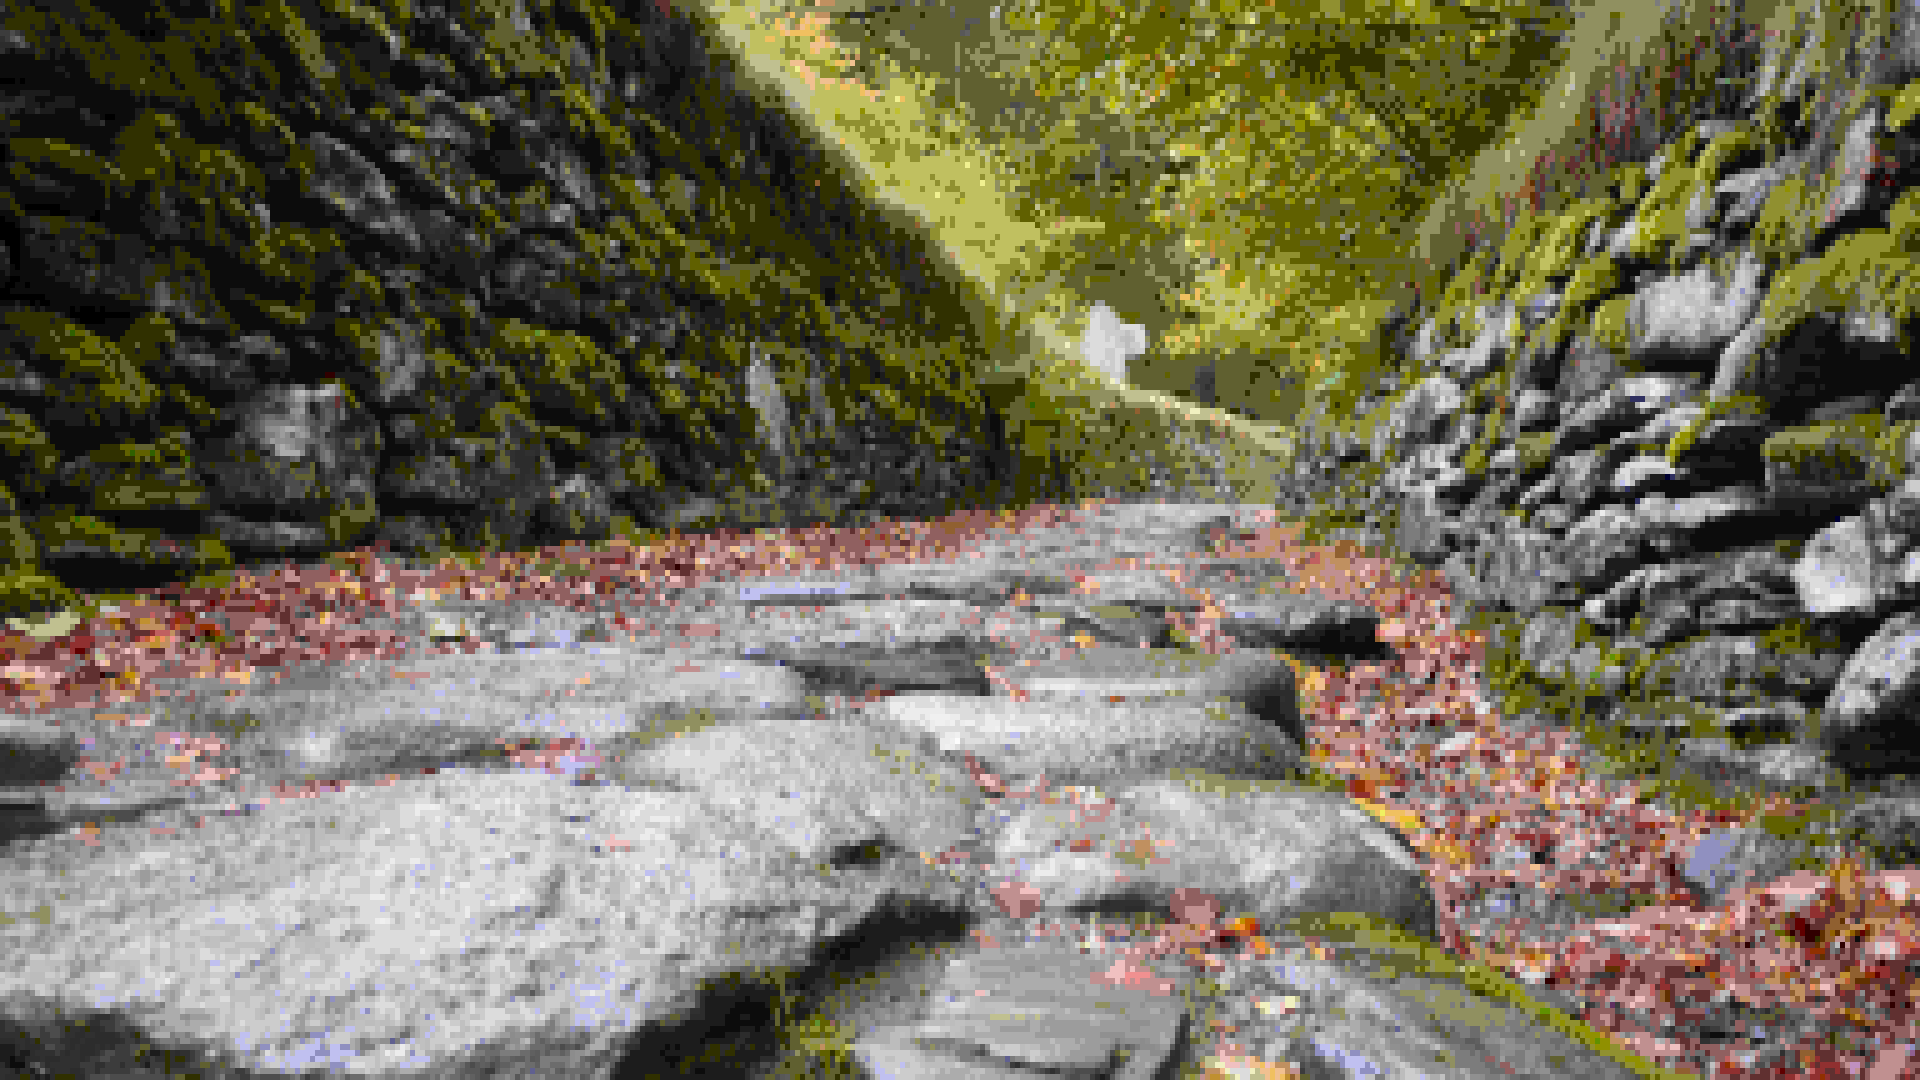
We'll need a source image to convert to a low fidelity graphics mode. In this case, we're using this landscape photo from Flickr, which has been released under a Creative Commons license that allows for modifications and commercial use:
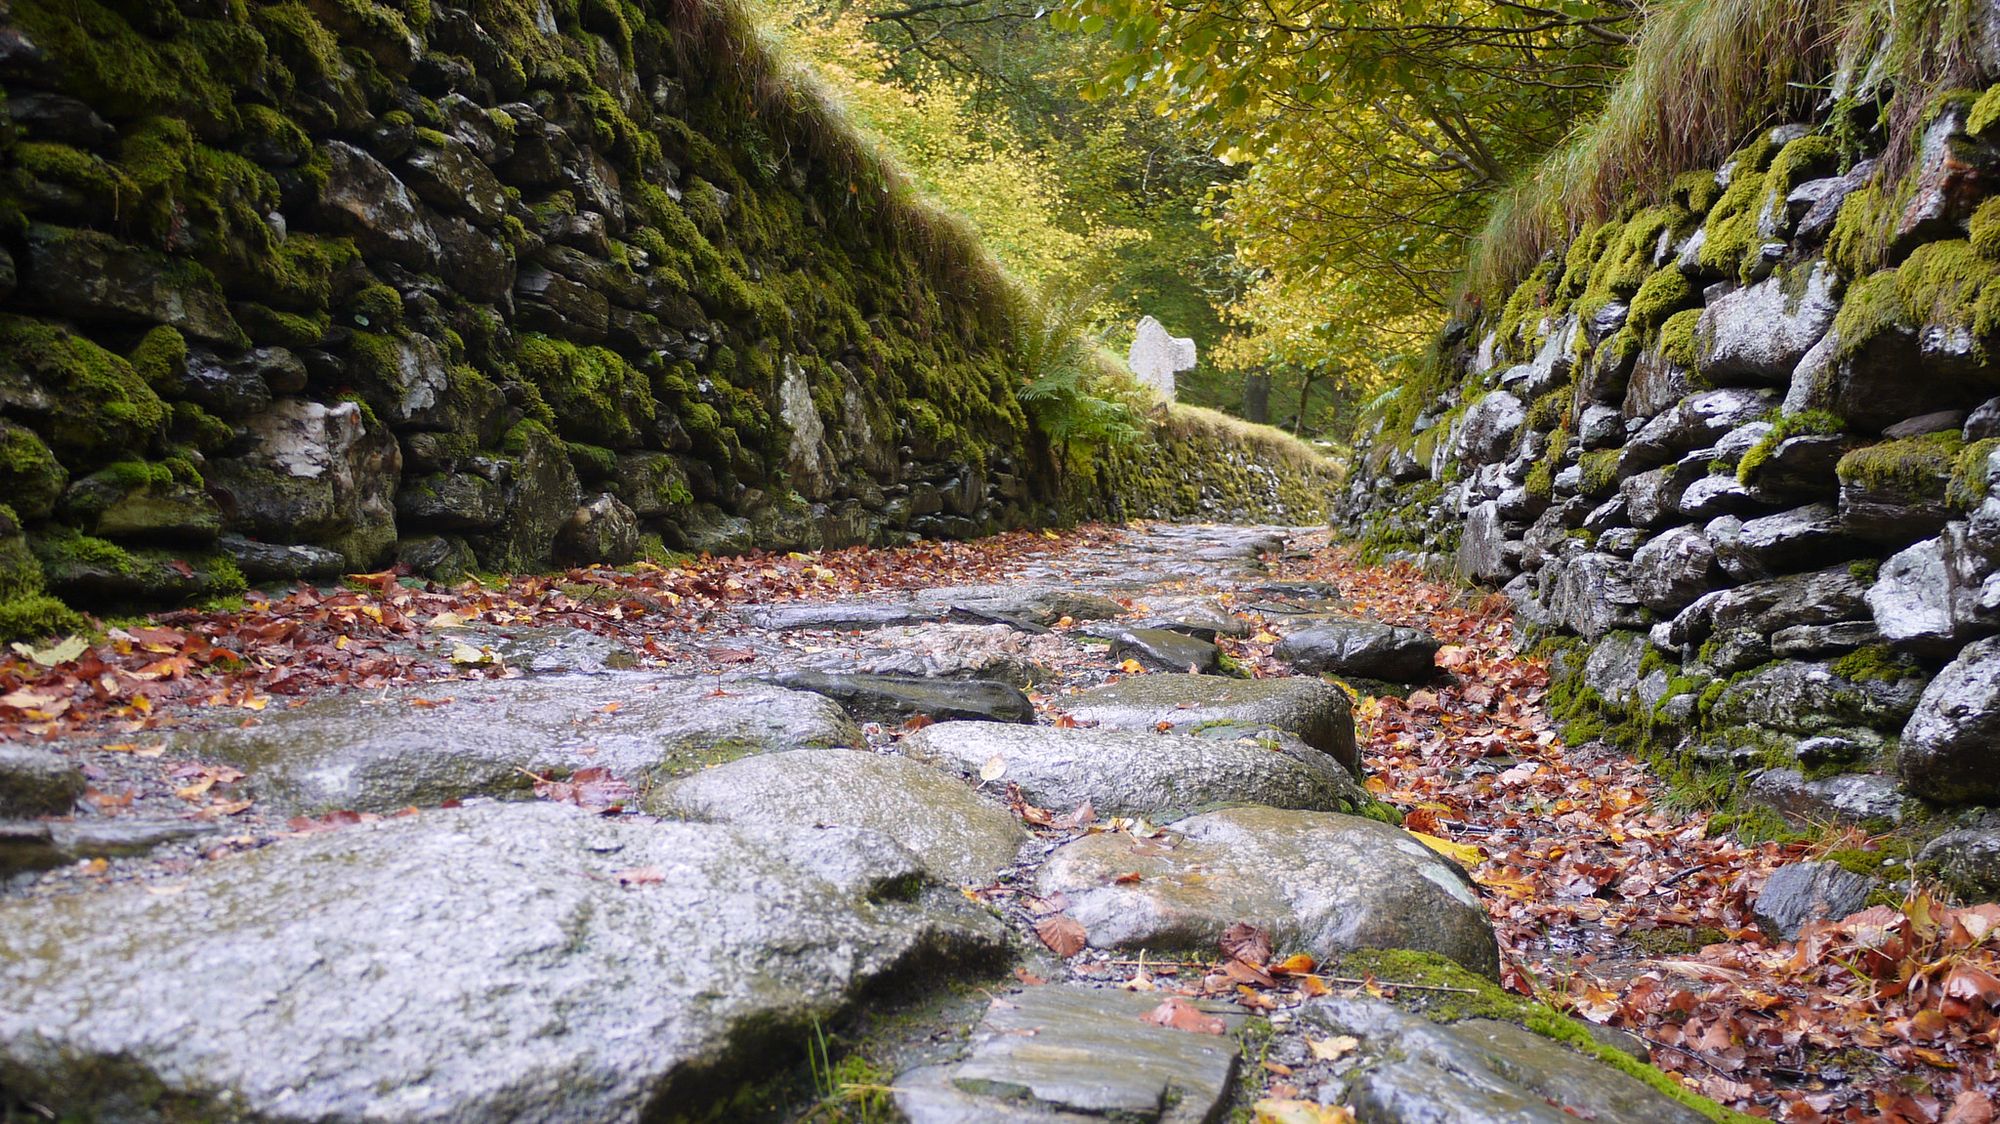
This particular image is fairly detailed, and a much higher resolution than our final product will be.
Fixing the Pixel Aspect Ratio
In VGA Mode 13h (256 color graphics), each pixel is slightly taller than it is wide, with an aspect ratio of 1:1.2. Modern displays use square pixels, so we can simulate this by using solid blocks of color that are 5 pixels wide and 6 pixels tall.
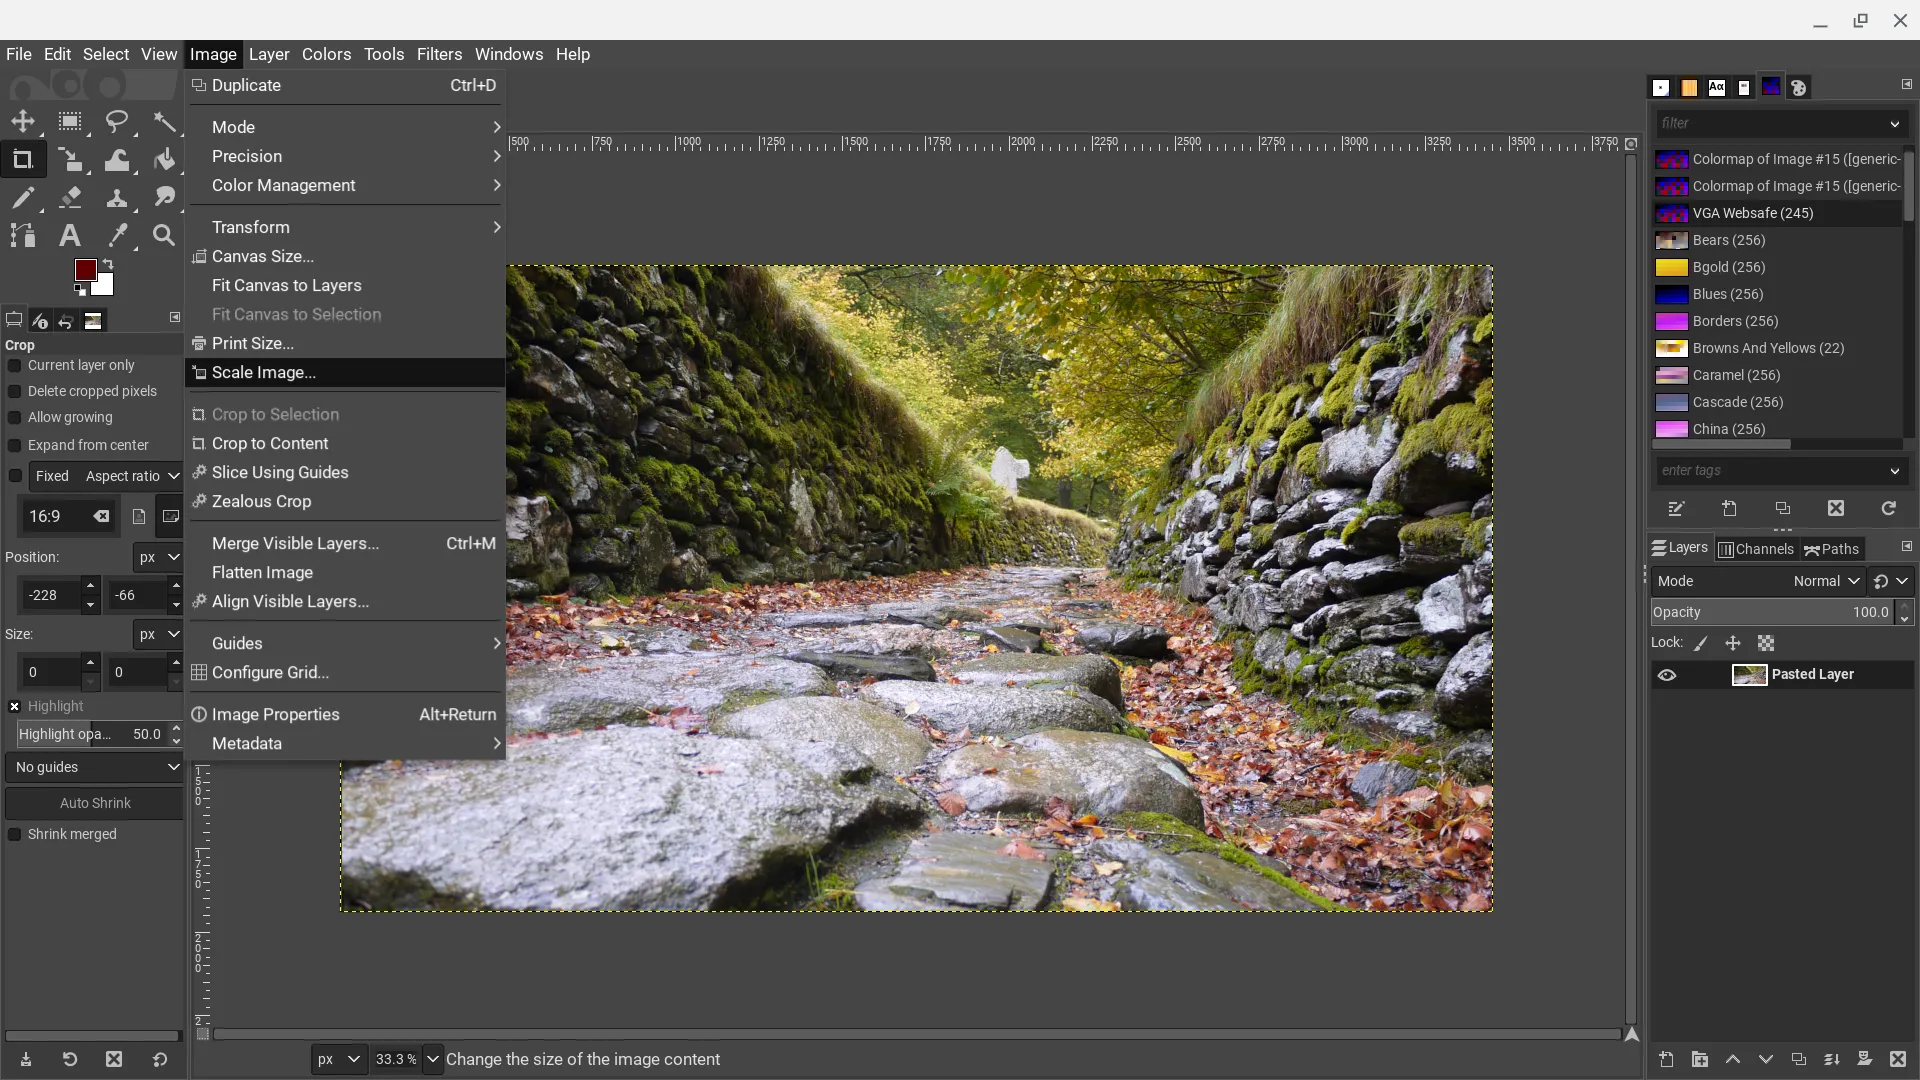
Our final image will have a resolution of 1920 x 1080, so we'll need to use the Crop tool to cut the image to match that aspect ratio. To make this easier, the GIMP has an option to set a fixed Aspect Ratio when using the Crop tool. In this case, our target has a 16:9 aspect ratio, so we'll set the aspect ratio to that, and crop the image appropriately.
To determine the simulated resolution, we divide the width by the width of each simulated pixel (5 pixels, so 1920/5 gives us 384) and divide the height by the height of each simulated pixel (6 pixels, so 1080/6 gives us 180). From the 'Image' menu, select the 'Scale Image...' option to shrink the image to this size.
This opens a dialog box with options to scale the image:
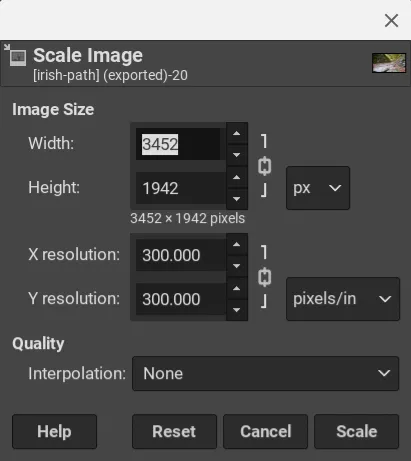
First, be sure to uncheck the link icon to the right of the Width and Height inputs. When selected, this links the width and height values by aspect ratio to prevent distortion. Since we're purposely trying to distort the aspect ratio of the image, we'll need to break the link so we can supply the target width and height separately.
In the Quality section, we have the option to select a value for Interpolation. This determines how the GIMP will attempt to preserve detail when scaling the image:
- The None option uses the Nearest Neighbor algorithm to scale the image, which directly samples the pixels in the source image without any smoothing applied. This can introduce some distortion when downscaling to a resolution that doesn't divide evenly into the original resolution, and creates a blocky, pixelated look when upscaling an image
- The Linear option uses a simple linear smoothing algorithm to reduce the artifacts that Nearest Neighbor algorithm can introduce
- The Cubic option uses a slower algorithm than the Linear option, which generally preserves detail better
For downscaling the image, we're going to use the Cubic option. Once all of the options are set correctly, press the Scale button. This should give us a smaller version of the image, which will look a bit vertically squashed.
Applying a Colormap
Next, we'll need to convert our image from RGB to Indexed Mode. This means that the image will no longer contain RGB color values for each individual pixel. Instead, it will use a look up table containing all of the colors that exist in the image, and each pixel will be a reference to one of those predefined values. The GIMP supports up to 255 unique colors when using Indexed mode, which is almost perfect for simulating VGA graphics.
This opens a dialog with various options to determine how the GIMP will handle converting the image to Indexed mode.
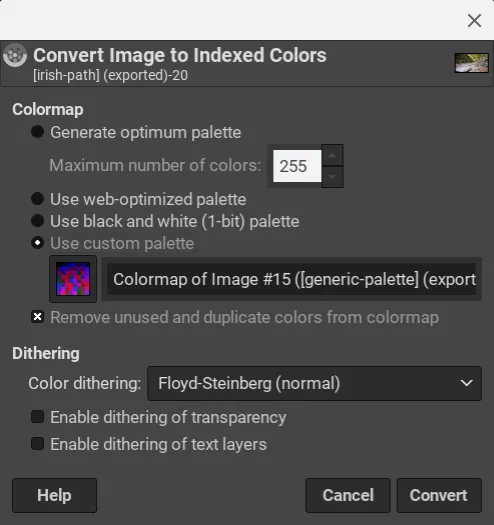
The dialog has two primary functions:
- The Colormap section determines how to get the color lookup table for the image
- The Dithering section decides how the GIMP will deal with sections of color that aren't in the color index
For the Colormap, we'll select the 'Use custom palette' option, which will enable a dropdown containing various color palettes that ship with the software, and any custom palettes we've created. Here, we'll select the palette we created earlier.
The Dithering section gives us a few different options for how to handle colors in the source image that are not part of our color palette. For this image, we're really only concerned with the 'Color dithering' dropdown. This gives us four options:
- None does not apply dithering to the image. This means each pixel is converted to the closest color available in our Colormap, and may result in significant color banding and detail loss if the source image has subtle color changes
- Floyd-Steinberg (Normal) uses a common dithering algorithm to break up color banding by using pixels with different colors from the Colormap to simulate a color that isn't available
- Floyd-Steinberg (Reduced color bleeding) is a variation of the Floyd-Steinberg algorithm which attempts to avoid creating areas in the image where a color 'bleeds' into another area
- Positioned uses a simple checkerboard pattern to break up color banding when necessary
Having said that, it's probably easier to explain using sample images:
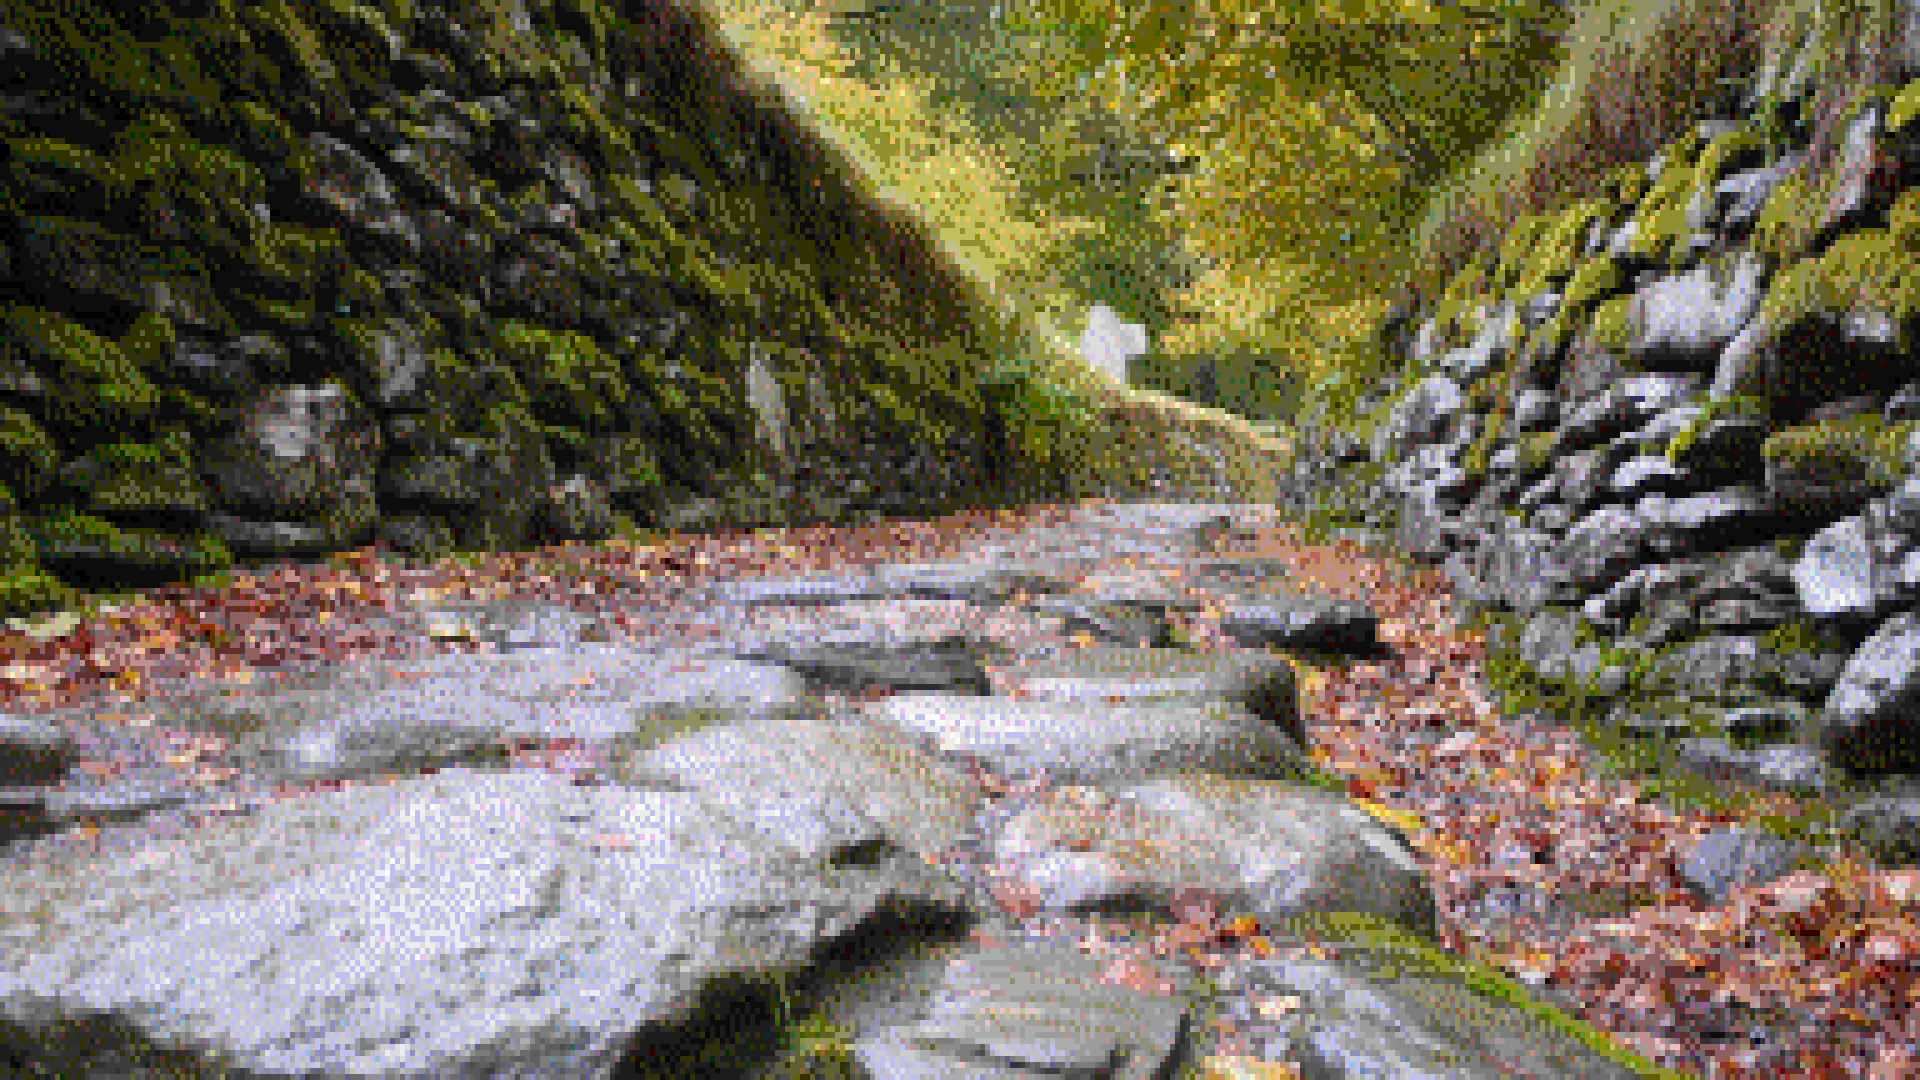

Scaling to the Target Resolution
Once we've converted the image to the Indexed color mode, with our preferred dithering algorithm applied, we can scale the image up to its target resolution.
Open the Scale Image dialog again. Make sure the width and height are not linked by aspect ratio, and enter the target resolution (1920 x 1080 in our case). Under Interpolation, select the 'None' option to use the Nearest Neighbor algorithm for a pixelated look. Press the Scale button to apply these changes.
Final Thoughts
While this technique gives us images with a retro, nostalgic look, it's important to clarify that this is not considered Pixel Art, since we're not hand painting pixels. That being said, it's certainly valid to use this for reference when trying to visualize how different textures might look in a pixel art style, or to get inspiration for how to draw or block out a pixel art scene.
This technique also works for showcasing VGA style pixel art. One would simply start with the shrunken canvas and limited color palette, then use the final step to convert it to the target resolution. Similarly, one could simulate palette switching for different animation effects, by switching out certain color swatches, but that is outside the scope of this tutorial.
Filed to:
Learn | Retro Graphics | VGA